
HELLO my stamping friends!! While it's been just a wee bit difficult to move during the holidays, unpack, get organized, do Christmas shopping and decorating and oh yeah, all the other ordinaries of my day with my 2 little girls and hubby, I am getting there ;) I haven't really had the chance to stamp though(gasp!) - but I am getting my new oasis all situated so that I can get going real soon!!
My stampin friends couldn't believe I was organized enough to have them over for a little card making and lots of munchies, (I had to see my girls before the holiday!!)but we had a great time and we reminisced over some of my holiday kreations from last year. I've missed playing with my Pals at the PPA, and realized many of my favs were PPA submissions from last year :) Check out the current 'Winter White' challenge - I hope you have a chance to have fun kreating. Hope you enjoy my parade of past Christmas cheer ! If you'd like to view more holiday inspiration, click below this post on the label CHRISTMAS.


Reminders:
* Holiday Bundles - Save 20% - Holiday favorites from the Holiday Mini. View Bundles . ENDS Dec 16th
* Filled w/ Love Bundle - Coming SOON!!! FREE bitty buttons and DSP. More Info
* Online - Check out NEW MDS downloads and the Clearance Rack
You can purchase all products online with me or email me with your orders. Any questions, I am always happy to answer!
Happy Kreating
Thursday, December 9, 2010
Cards of Christmas past


Friday, November 19, 2010
Welcome Home :)

The list of blessings to be thankful for this Thanksgiving are long...
... Those of you that follow know that we have had quite the saga in our real estate transactions! The banks have never been more careful over every i dotted and t crossed - so after 5 long months of legal mumbo jumbo, it is FINALLY happening. We are set to close this afternoon on our purchased home!! So I have been packing up the last minute 'this n thats' and I haven't had a chance to stamp this week :( I have a definite unpacking priority though ;) But I thought it appropriate to share this CASE'd card I had done(I have no idea where I originally saw this,possibly SCS but all my favorites were whipped out :( So if anyone knows the kreator, please let me know!)
Clean and simple and just adorable.
* My door was kreated on a standard cardbase of Whisper White
* Door 'panels' where distressed with Crumb Cake
* An Olive Green wreath from Northern Hearts Hostess Lev 1 set in the Holiday Mini, was snipped out with my Paper Snips
* Of course a little bling must be added to my wreath, and what a purdy wreath with some bedazzling Basic Pearls - just makes it so sweet!
* A doorknob with a 5/16" brad from the Jumbo Brads collection
* And finally using the NEW Seam Binding(Holiday Mini)in Cherry Cobbler for a bow on wreath. This week my Pals are playing with ribbon and fabric for this weeks PPA challenge - go check it out and have fun playin!
Gotta run, off to sign papers and pick up keys to our new house! YIPEEE!!!! I mentally preparing myself now for the sore muscles I will probably have for the next week! LOL But I'll be back as soon as I can with new kreations. It won't be too long, I can't wait to set up my new craft room (even with sore muscles! ;)
You can purchase all products online with me or email me with your orders.
Don't Miss:
* 50% OFF Starter Kit - Join My Krew and enjoy the wonderful benefits of being an SU Demonstrator with NO penalities and NO obligations. Contact me for more details!
* 20% OFF select Holiday Bundles!
Happy Kreating
Tuesday, November 9, 2010
Holiday Lineup

I decided to play with The Paper Players this week with their oh so fun Snowman theme challenge #23. And I thought there was another challenge out there All That Glitters, but maybe I just dreamt that one?! But anywho, I decided to combine it with my snowmen, dream or no dream! I was lucky enough to have just borrowed the Holiday Lineup set from my SIL (thanks Lizzie) and decided to put it to use with those cute snowmen. If you follow my blog, you know that I enjoy line images to color, so I couldn't wait to play with this set. Having so much fun with the snowmen, I decided to use each image, so make sure to scroll down to see :)
* Standard Whisper White cardbase
* Snowmen, from Holiday Lineup, inked in Basic Gray and stamped onto Whisper White.
* Colored in my images with various SU Markers TIP: Kreate darker hues of the same color by coloring over the same area multiple times. If you like matchy matchy, no need to stress over finding coordinating colors - use the same color, just make it darker!!
* Lightly penciled in a frame around the image. Followed my line with Crystal Effects and added White Chucky Glitter to 'frame' my cute little snowmen.
* A little more sparkle was added to the hat pom pom with Dazzling Diamonds.
* Finished it off with a Baja Breeze sentiment from Many Merry Messages.
And here are Santas Elves and Reindeer using the same design
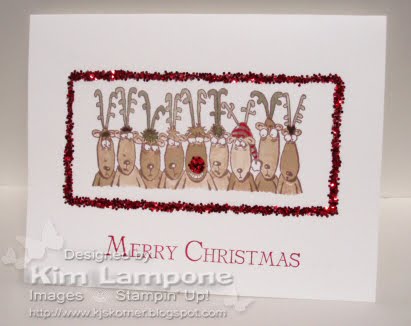
Simple colored in images with lots of white space and a 'frame' with pizazz ;)
Thanks so much for stopping by for a little dose of me! So what did you think of my Holiday Lineup? I'd love to know what ya think, so please leave me a comment and let me know, K? Any questions, I am always just a click away!
You can purchase all products online with me or email me with your orders.
Happy Kreating
Challenges:
The Paper Players - Snowman theme
Simon Says Challenge - All White except image
Craft Your Days Away - All White
Flourishes Timeless Tuesday - Glitter
Wednesday, November 3, 2010
JOY

Tis the season and I just love making Christmas cards. This will be one of the options for an upcoming SAS - easily reproducible (no extra postage required either!) for that long list of friends and family that we want to dazzle with our handmade paper skills. Using the Big Shot really cuts down on the time it takes to kreate cards. Yet it looks like we could have spent hours with all the details :)
* Cherry Cobbler standard cardbase
* Whisper White ran through the Big Shot with the Petals a Plenty embossing folder
* Added to this already beautiful texture just a little shimmer -
Using a Dauber, I inked it up in the cap of my Frost White Shimmer Paint and lightly ran the dauber across the raised petals. Beautiful frosted look
* Ran some Cherry Cobbler through the Big Shot with my Serif Essentials Bigz letters
* Inked up the ornament from Tags Til Christmas in Cherry Cobbler and punched out with SU's coordinating Ornament Punch.
* A little bling with some Basic Rhinestones added to the ornament and a little bow tied in retired silver cording.
* Each element added to the base with a Dimensional for the little extra wow factor.
Clean, simple and festive! Do you like it?? Sometimes its hard to fully embrace simple LOL But I think this one works ;)I'd love to know what ya think, so please leave me a comment and let me know, K?
Thanks so much for stopping by for a little dose of me! Any questions, I am always just a click away!
You can purchase all products online with me or email me with your orders.
Happy Kreating
Thursday, October 28, 2010
A PPA Sketch and Good Cheer
 Its time for a sketch challenge at the PPA and I decided to play with The Paper Players and their Recipe Challenge: dsp, something punched, and a sentiment. As soon as I saw this sketch, I knew I had a different 'type' of card in mind. It's not your usual open and shut card, but a little message tucked into a 'pocket'. Loved the idea in my head, but not quite sure I love my design yet ;) Its growin on me LOL
* Started with a 4-1/4 x 11 piece of Bravo Burgundy cardstock. Folded it in half. Using my Dauber and Expresso Ink, I distressed the edges of the card
* Next, score and fold a 'flap' at 1". Gave my flap a decorative edge with the Eyelet Border Punch. And some Crochet Ribbon Trim for that vintage look AND I couldn't pass up some Basic Pearl pretties. Purdy lil flap
* Add an insert to your pocket - I used a piece of Very Vanilla 3-3/4 x 5-1/4 and a piece of Deck the Halls DSP to dress up what peeks out of the 'pocket' TIP: Place your insert between the pocket and then adhere top two corners of pocket together with a glue dot/dimensional. You want to make sure you have enough room to slide in and out your insert.
* Finishing off the front... inked up the Santa image (love this image!) from Good Cheer in Bravo Burgundy and stamped onto Very Vanilla.
* Attempted the cracked glass technique with 4 layers of clear embossing powder and it didn't quite crack so good - any suggestions what I did wrong (maybe I can't use embossing powder???), but I went with it.
* Do stress the distressing when going for that antique or vintage feel. Distressed what I could over some cracks and along the edges with my Dauber and Expresso Ink. Matted it onto a piece of Crumb Cake and, yup, distress those edges!!
* Grabbed my Paper Snips and cut out some holly leaves from a scrap of dsp for the final element of this sketch.
Thanks so much for stopping by for a little dose of me! Hope you enjoyed my card for todays challenge. I'd love to know what ya think, so please leave me a comment and let me know, K? Any questions, I am always just a click away!
You can purchase all products online with me or email me with your orders.
Happy Kreating
Thursday, October 14, 2010
No Ordinary Envie

More fun from my last class to show you. Continued vintage style since we were using the fabulous Deck the Halls DSP in the Holiday Mini. This is a pretty way to turn an ordinary envelope into a little gift, maybe add some 3x3 cards w/ envies, some holiday cash ;) or check or maybe even a few gift tags. Let me share how...
* Took a Small Open Ended Envelope (107286) and sealed it. Fold it in half and then unfold. Using my paper trimmer, I cut away about 1/8" along the long side. Now you will have 2 'pockets' along the top to place your goods in. HINT: a few 3x3's without a lot of embellishments will fit perfectly on one side, envies on the other.
* Now it is time to decorate your envie. To stay vintagey, I had to alter the very stark white envelope: dauber and distressing. Inked up the dauber with Soft Suede and distressed around all edges. See, not so stark.
* Layered a piece of Deck the Halls DSP to the front and back. Distressed the edges again
* This NEW Decorative Label punch is awesome! Popped that out in Cherry Cobbler and distressed the edges with Soft Suede ink.
* Using the Tags Til Christmas set, in the Holiday Mini, I inked up the 'square' shaped sentiment in Old Olive.
* Dare to be different - I chose to pop out that 'square' sentiment with my Large Oval punch instead of matching it up with a square punch. That stark white needed some daubbing again and a little something extra. Enter, Color Spritzer. Perfect spritz of Soft Suede adds more to the vintage feel.
* Popped the Large Oval sentiment up onto a dimensional and onto my Decorative Cherry Chobbler Label. An Itty Bitty Shapes Old Olive flower was punched out and bedazzled with a little Basic Pearl jewel.
* The little punched ensemble was placed on dimensionals and placed in the center.
* Victoria Crochet Trim is 'threaded' beneath the label and wrapped around the back to be tied for a pretty little closure.
The inside: * With my Color Spritzer still hooked up to Soft Suede Marker, I decided to spritz away on the interior.
* Direct to stamp technique, so cool! - with my Old Olive and Cherry Chobbler Markers, I isolated the words and directly 'colored' on the rubber, huffed the stamp to remoisten and stamped to the inside. Words come from the Tags Til Christmas set too.
* The holly leaf from Good Cheer was stamped in Old Olive and then colored in my berries with Cherry Cobbler.
Tags from the Tags Til Christmas set were kreated and later tucked into the little pockets of the envie. A little gift idea perhaps?! Here are a few of my sample tags.
As always, any questions I am just a click away! Hope you had fun with this one and let me know what you think?! Thanks for stopping in for a little dose of me ;)
Don't Miss :
** FREE Tote- Become a part of my team, hobby or business demos welcomed, and receive this adorable tote- Offer ends Oct 18
** Clearance Rack Blitz - Take advantage! 200+ products just added, up to 80% off retired products while supplies last. Online orders only!! Happy Shopping
** WIN approx. $400 in My Digital Studio Downloads - click HERE for contest details (contest ends Nov 15)
You can purchase all products online with me or email me with your orders.
Happy Kreating
Monday, October 11, 2010
Northern Flurry Greetings
 Simple and schnazzy ;) I was asked to kreate simple, which I think I accomplished but I had to add a little 'umphf' ;), but even with some umphf, I still think it will qualify as simple. You tell me?!
* Started with a base of Shimmer White Cardstock
* Ran through the Big Shot with the Northern Flurry Embossing folder from the Holiday Mini
* With my always faithful Daubers ready to rumble, I inked one with VersaMark and swept it across the embossed snowflake images and sprinkled Heat and Stick powder. With my Heat Tool, heated the powder until melted to kreate a sticky surface
* Then layered some gorgeous White Chunky Essentials Glitter. Wishing you could see how pretty this is in person! TIP: After I apply chunky glitter, I turn the card face down and press on the backside to get any excess off or to 'secure' the 'crystals' to the sticky surface
* Finished, yup, finished off the card with the sentiment from the Hostess Lev 2 set Peaceful Season. Stamped in Encore Silver ink, hurry this may still be available on the Clearance Rack for ONLINE orders, and heat set with Clear Embossing Powder.
Easy Peasy card - under 15 minutes to kreate! Seriously it took more time trying to capture a good angle for this photo LOL (not easy to photograph white and shimmer). I do hope you like it! I'd love to know your thoughts if ya take a moment to leave me a comment! Thanks so much for stopping in for a visit
Don't Miss :
** FREE Tote- Become a part of my team, hobby or business demos welcomed, and receive this adorable tote- Offer ends Oct 18
** Clearance Rack Blitz - Take advantage! 200+ products just added, up to 80% off retired products while supplies last. Online orders only!! Happy Shopping
You can purchase all products online with me or email me with your orders.
Happy Kreating
Wednesday, October 6, 2010
Deck the Halls duo

So my class the other night... after lovin their oooooo so spooky treats... we jumped right into Christmas mode. I love doing vintage, so of course I had to have the new Deck the Halls DSP in the Holiday Mini AND had to have the Big Designer Buttons AND had to have the new fabulous Designer Fabric in Deck the Halls AND... well, I just about want it all, but I'm being good (sorta)! Anywho, let me show you one of the projects we kreated...
* Ran a piece of Crumb Cake and the holly pattern, from Deck the Halls dsp, through the Big Shot with the Matchbox Bigz XL Die. Assembled: quick and cute
* Cut a piece of the Always Artichoke Deck the Halls Designer Fabric and frayed the edges. Simply pull fibers away to kreate this soft vintagey look.
* Using a Cherry Cobbler Big Designer Button, I threaded my fabric through 2 diagonal holes. Knotted and snipped.
* Stamped my Teeny Tiny Wishes sentiment in Cherry Cobbler onto Crumb Cake, distressed the edges with a Dauber and Soft Suede ink and further distressed the edges with my finger nail.
If that isn't so cute?! A little 3x3 card to match makes for thee perfect ensemble.
* 3x3 Crumb Cake cardbase distressed with Soft Suede ink and spritzed using the Color Spritzer with Soft Suede ink for a little more of a vintage feel
* The scrap piece of fabric from the little box came in handy for this little card. Ruffled up makes a cute embellishment, doesn't it?
* Inked up my Christmas Classic tree with a Always Artichoke and Choc Chip Marker and stamped onto Whisper White. A bit o bling bedazzles for the topper
* Punched out with the new Extra Large Decorative Label punch and matted with Cherry Cobbler.
Hope you liked the Deck the Halls duo, both projects decked out in dsp and fabric
Love it when you stop in for that little dose of me ;) Please leave me a comment and let me know what ya think, I love that too!
Any questions, about project details, techniques, placing an order or becoming part of my team, I am more than happy to assist, I'm just a click away and we can schedule a chat!!
Don't Miss :
** FREE Tote- Become a part of my team, hobby or business demos welcomed, and receive this adorable tote- Offer ends Oct 18
** Clearance Rack Blitz - Take advantage! 200+ products just added, up to 80% off retired products while supplies last. Online orders only!! Happy Shopping
You can purchase all products online with me or email me with your orders.
Happy Kreating
Thursday, September 23, 2010
Peace
Where have I been?...Lets see, we continue with our housing saga, but packing has resumed (only thinking positive now), we got through the first week of school and sports, AND the first bout of germs with both kids catching colds and then a stomach bug... so yes, I decided to climb through the boxes to my rather messy stamping oasis and have some me time :) One day I will look back at all this and have a good laugh - heck I'm laughing now (when I'm not wanting to burst into tears LOL) Keeping me on my toes and teaching me lots of patience! Life is good! ;) And so is taking the time to stamp with the PPA!! Todays challenge is a sketch challenge. I've been itching to ink up this set, and peace was all I could think about when I 'got away'.
* Inked up the Lev 2 Hostess set, Peaceful Season, from the Holiday Mini, in Cherry Cobbler and stamped onto Very Vanilla. Rounded the edges using a 1" Circle Punch. Isn't Cherry Cobbler such a rich an elegant color for the holidays? I'm lovin' it!
* Ruffled up my Very Vanilla Satin ribbon. How? Quite simple really - fray the edge of your ribbon and find a thread fiber that goes the length of the ribbon (not the 'fray') and gently pull and tug fiber which will kreate your ruffle. Ok, easier to do than explain. Give it a try, you'll get it!!
* Embellished with one of the fun NEW Big Designer Buttons, from the Holiday Mini, in Cherry Cobbler and tied with a piece of Linen Thread.
* Take it to the Big Shot!! Emboss your background for a very quick and elegant look! Zipped through Very Vanilla cardbase and Petals a Plenty Embossing folder - so pretty!
* Me and my Daubers, love them - always a must it seems on any card! Applied Champagne Mist Shimmer Paint to the embossed petals. Tip: shake up paint, paint will be stuck in the cap, guess what?, perfect fit for your dauber! Easy to ink up, less messy!
* Next, inked up the Dauber with Champagne Mist and applied to my dove image. Stamped onto Very Vanilla and snipped out with Paper Snips - these are so great for small and precise cutting!
* Placed focal image on dimensionals on cardbase and gave the dove some extra dimension as well!
Thanks so much for stopping by for a little dose of me! Hope you enjoyed my card for todays challenge. It definitely brought some peace to my day. I'd love to know what ya think, so please leave me a comment and let me know, K? Ahhhh, felt good to be back, but now back to more packing.
You can purchase all products online with me or email me with your orders.
Happy Kreating
Thursday, December 24, 2009
Merry Christmas
Christmas comes so quickly, all the anticipation, all the preparations, all the joys of the season and then in a snap, it seems the day has passed all to quickly too.
I hope you can take some time during the last few busy hours to reflect on the true spirit of CHRISTmas. May you have a joyous time with all your friends and family.
God Bless and a Very Merry Christmas to you and yours!!
I'll leave you with these Christmas projects (inspired by a gift given to my Pal Mike and this Rudy)
It's almost that time...He is getting ready to don his best trousers and call on the leader of his pack... Ho Ho Ho
Merry Christmas...And to all a great night!
Wednesday, December 23, 2009
Clean and Simple
Phew, I'm exhausted! And I still have baking and more wrapping to do. I know I'm not alone though am I ;)
I'm bringing a few kreations to you that are clean and simple to make, for any of those last minute card makers :)
It saddens me that I will soon be putting away all my Christmas sets and I haven't even had the chance to share all my kreations with you. Ah well, there is only so much time. Without further ado, because there is still much to do :) ... Here are a few kreations. Some CASE'd, tweaked in my own way, but inspired by some other wonderful talent out there.


Hope these inspire you for any of those last minute preparations!
Shop ALL product orders online with me.
Monday, December 21, 2009
A Santa and some Snowmen
Yesterday my littlest turned 3. I just can't believe how time flies - Happy Birthday Samantha! 
And what a treat to 'party' in a fresh snowfall. She and her sister had so much fun!
OYE, I've been SO busy, like I know many of you! So I will quickly show you what I did for my oldest daughters pre-school party. Cute little Santa's made using my Big Shot, the Top Note die and some punches. I perched him on giant Candy Canes for all the kids in her class. Cute right? PS - I don't know who the originator of this idea is, but if you know, I give them FULL credit :)

My Simple Seasonal Thanks snowman, from the Holiday Mini Catalog (111548 available only through Jan 4, 2010) - kreated a cute little gift package for her teacher. Stamped in Stazon Black for a crisp image and snipped out using the fabulously sharp Paper Snips! Using some different colored SU Markers I decorated the hat and scarf. With some Crystal Effects and Dazzling Diamonds I made the 'brim' of the hat shimmer. So cute! On his Only Orange carrot nose, I added a tad more Crystal Effects.
Packaged them and tied them up with Real Red Polka Dot Ribbon with a few dangling snowflakes (can be found online in the Clearance Rack!)

Hope this inspires you for a few of those last minute gifts. Because of all the hustle and bustle I have left, my future posting will be short, but hopefully still inspiring :) Don't forget, the 12 Days of Holiday Sales ends tomorrow. If you own the Big Shot or like machine, you won't want to miss it!!Check out the items on sale online!
Shop ALL product orders online with me.
Thursday, December 17, 2009
A Winter Wonderland

In the meadow we can build a snowman and pretend that he's a circus clown, we'll have lots of fun with Mr Snowman, until the other kids knock em down When it snows ain't it thrillin tho your nose gets a chillin, we'll frolic and play the Eskimo way, walking in a winter wonderland!
Welcome to my Winter Wonderland themed challenge for the PPA. One of my childrens favorite books is 'A Stranger in the Woods' - an endearing story of wildlife finding a new friend in the woods. We have many other snowmen story favorites, so I recreated a scene for my card. Let me tell ya, my oldest daughter is my biggest fan, but this card put her over the top. She thought it was the 'bestest' card I've ever made. I don't know about that, but to see how happy it made her is memorable!!
Now if you are looking for a quick card to make, this is not it LOL. But it was worth the time to see the look on my daughters face. :)
* Inked my snowflakes from Serene Snowflakes in VersaMark and stamped onto Glossy White Paper (leaving an area to left where my tree will stand later)
* A must, Iridescent Ice Embossing Powder and heat set to give those flakes a sparkle.
* Using my brayer and Bashful Blue ink, I rolled over the entire Glossy Paper. The snowflakes images resist the ink and kreate a perfect snowfall and sky
* I kreated my tall evergreen tree, inking my tree from Lovely as a Tree in Handsome Hunter and stamping it horizontally down the side.
* Went back with my Choc Chip Marker and added a trunk and some branches. Of course a little snowfall landed on a few branches using my White Signo Gel Pen and a few small accents with Crystal Effects and White Essential Chunky glitter. (sorry a photo doesn't capture these details)
* Tore a piece of Whisper White to kreate my mounds of snow. Brushed the edges with my VersaMark pad, added Iridescent Ice Embossing Powder and set with my Heat Tool for the ultimate glistening snow.
* This cute little snowman comes from the Lev 2 Hostess set Snow Buddies in the Holiday Mini. Outlined him using Bordering Blue marker and completed the rest of him with a Basic Black Marker. A huff of breath to remoisten and stamped onto Whisper White. With my most favorite scissors ever, Paper Snips, get into every nook and crany! With my blender pen, I picked up some Bordering Blue ink and highlighted. Popped him up on dimensionals.
* Now to his 'Forest Friends', aren't these woodland creatures so cute, finishing off their snowman. My deer, inked in Soft Suede and snipped out, has the little twig arm nestled in his mouth. While one of his little bunny friend waits to place on his hat! Now you may be wondering how I have the bunny image in both directions... a little secret... I stamped him in Sahara Sand onto transparency paper and took a piece of Whisper White and firmly rubbed it onto the transparency. I will not lie, he initially was a tad blochy, but what wonders a Blender Pen and some more Sahara Sand ink can do!
* The perfect sentiment came from a retired RubOn set, Word Flurries. This item, 111417, can still be found in the Clearance Rack Online!! And what a deal $4.99 (reg $10.95)
* Added a Polka Dot Red Ribbon to the corner and placed it onto a standard Soft Suede Cardbase.
Hope you enjoyed my Winter Wonderland, now won't you go kreate your own Wonderland and don't forget to upload it to Mr Linky on the PPA!!
Shop ALL product orders online with me.

Supplies:
Stamps: Forest Friends (113748), Snow Buddies (lev 2 hostess set - 116505), Lovely as a Tree (115026), Serene Snowflakes (115438_
Paper: Glossy White, Soft Suede, Whisper White
Ink: Bashful Blue, VersaMark, Handsome Hunter, SU Markers: Bordering Blue, Basic Black, Real Red, Summer Sun
Accessories: Brayer, Iridescent Ice Embossing Powder, Heat Tool, Chunky Essentials Glitter, Crystal Effects, Real Red Polka Dot Ribbon, Paper Snips, Blender Pen, retired RubOns
Monday, December 14, 2009
Vintage Hat Box

A bit of a 'later' post, but with all the hustle and bustle of the season, my days are getting increasingly more hectic. But I wanted to share one of my wrapping ideas with you. I absolutely love the versatility of my Vintage Ornament stencils. Click here to view a few other kreations. This is a small 'hat' box (approx 7" diameter) that I purchased at my local craft store.
* Place a little removable Dotto adhesive to the back of your stencil and position as desired. (Careful when removing stencil!)
* Mask your ornament hanger with a Sticky Note. Ink up a piece of your sponge in the color of your choice and rub sponge in your image, reinking sponge as necessary. Move mask into ornament, ink up a Sponge Dauber and ink your 'hanger'. The colors for my ornaments were Encore Gold hangers, Bravo Burgandy, Handsome Hunter and Soft Suede ornaments.
* Take your accent stencils and apply ink with a Sponge Dauber and kreate your decorative accent. (Gold Encore accents were used for this project)
Now is when to say enough is enough, but no I had to keep playing. Wishing I hadn't, as the design got a bit smudged and I had to attempt to fix it
* After trying to apply some shimmer paint to my center ornament, the Bravo Burgandy seemed to 'lift' a bit kreating more of a smeared look - NOT what I was going for :(
* What to do... I had some stencil paste which I used to 're' accent my flourish in my center ornament. After this dried, I applied some more Gold Encore ink to the flourish. It will have to do!
* Gold cording bows 'hug' the necks of each ornament
* Inked up the words, using a sponge dauber, from an image in the Christmas Punch lev 2 Hostess set in Bravo Burgandy and stamped.
* The gorgeous Wide Choc Chip Striped Ribbon fits snuggly around the rim of my 'hat' lid.
I thought this would end and go to the land of 'misfits', but I think I managed to save it. It didn't turn out entirely as I had hoped, but I hope it inspires you to get krafty with your packaging this holiday! Off to continue with more hustle and bustle :)
Shop ALL product orders online with me.
Supplies:
Stamps: Christmas Punch (hostess lev 2 115366)
Stencils: Vintage Ornaments I & II (117580, 118141 - from definitely decorative catalog)
Ink: Bravo Burgundy, Handsome Hunter, Soft Suede, Gold Encore Ink
Accessories: Gold cording (holiday mini), Wide 1-1/4" Choc Chip Grosgrain Ribbon, Sponges, Sponge Daubers




 Posts
Posts


